Hello all! You probably noticed that I gave the blog a little face lift. I've been meaning to change it up a bit for a while now, but to be honest, I'm not totally sold on it yet... I need to give it a little time to grow on me. So it's very possible that it will change again in the near future.
In other news, I'm just over 20 weeks pregnant now! I'm feeling pretty good, but every now and again (like this morning) I feel like I just might throw up and feel super duper tired. I'm assuming this happens when baby hits a growth spurt. I'm feeling our little Sequel move around a lot lately. I started feeling movements around 14 weeks. It's true what they say about feeling movement sooner the second time. I don't think I felt anything with Isaac until 18 weeks or so, although with him I had an anterior placenta and this time I don't, so that probably had a little to do with it.
I'm also at the point where I'm getting up a lot at night to pee (I'd say the average is about 3 times per night). I was having some trouble sleeping a few weeks ago, but that has gotten better too. I've been waking up more rested and don't need to nap as much during the day (although I often don't have time to nap anyway).
J has been a great help with Isaac. The poopy diapers are pretty much entirely his responsibility these days because that smell can send me right over the edge. I know that sounds like an excuse not to change poopy diapers, but I speak the truth. I can't imagine being a single mom pregnant with a second child. It's hard to keep up with a toddler as it is, but pregnant and by yourself? No way, Jose. I just couldn't do it. I am very thankful for my husband.
Tomorrow is the big ultrasound day! I don't know why it's been so difficult for me to wait this time! I am just so excited to find out if Sequel is a boy or a girl! Although, I don't really care much either way, I just need to know! One the one hand, it would be nice to have a girl - I could shop for all those cute fru fru type clothes, and it would be kind of nice to have a boy and a girl, you know, one of each. Plus, then I wouldn't be outnumbered, lol. But on the other hand, if we have a boy, we will already have pretty much everything we need, even the clothes will be for the right seasons (unless this one is really huge or really small), Isaac would have a boy playmate (especially important since he has no boy cousins), and, I know this sounds silly, but I already know how to care for a boy. I feel like I'd be learning something completely new by raising a girl. So either way, we will be thrilled. I remember that after I found out that Isaac was a boy, he had so much more of an identity to me, and even though I didn't know it was possible, I felt like I loved him even more. I think that's why I'm so excited to find out what Sequel is. My baby needs an identity! And then we can start thinking about a name (yikes!).
So if you wouldn't mind, please say a prayer for our family today and ask that everything goes well with our ultrasound. All we hope is that Sequel is healthy.
Sunday, February 27, 2011
Saturday, February 26, 2011
Beef Tetrazzini
Ok, I'll admit that last weekend when I was freezer cooking, I got lazy and lost interest before I even got to my beef dishes. So... I ended up making those two recipes on Wednesday. The beef tetrazzini is something that I've never made before. I'm a pretty lazy cook, and this recipe uses up a lot of dishes - pot for the spaghetti, fry pan for the beef, two mixing bowls, a mixer, cutting board, knife - that's way more than I like to clean up, so it better be good. :)
Oh, and again, my laziness kicked in and I didn't bother taking any pictures of the cooking process, just photos of the final result.

Beef Tetrazzini
1 lb lean ground beef
1 medium onion, chopped
1 tsp salt
2 tsp Italian Seasoning
15 oz can tomato sauce
8oz cream cheese, softened (1/3 less fat)
1 cup cottage cheese (I use fat free)
1/4 cup sour cream (I use low fat)
1 green bell pepper, chopped
1 bunch green onions, chopped
8 oz spaghetti (I use whole wheat)
1/2 cup grated Parmesan cheese
Preheat oven to 325. Coat 9x13 pan with cooking spray.
Boil large pot of water and cook spaghetti according to package directions. Drain.
Brown beef and onion until beef is crumbly and onions softened (I just used a little onion powder). Drain off fat (if necessary). Add salt, Italian seasoning and tomato sauce (I accidentally used spaghetti sauce because I didn't read the recipe thoroughly. Tisk tisk.). Heat through.
In a medium mixing bowl, beat together cream cheese, cottage cheese, and sour cream. Add green pepper, green onion (I drastically reduced the amount of both because I didn't want it to get too strong over time) and hot drained spaghetti. Stir to combine. Spread in the bottom of the 9x13 pan. Pour meat sauce over the top. Top with Parmesan cheese.
Bake at 325 for aprox 30 minutes or until bubbly. Whenever you bake something with cheese on top, it's always a good idea to cover it with tin foil until the last 10 or 15 minutes, then uncover it and bake for the remaining time.

Friday, February 25, 2011
Chicken Burritos
{Sorry guys, I accidentally posted this without finishing it first. Oops. Here's the whole version.}
Ok, first let me say that these things are pretty darn easy to make. And they look great! I already had the chicken cooked and shredded, so it was a little faster than it would be if you had to cook the chicken and then shred it, but it only took me about 15 minutes to assemble these babies.
Here's what you'll need:
- 3 boneless chicken breasts (shredded)
- 1 pkg taco seasoning
- 8 oz salsa
- 1 (14.5 oz) can refried beans
- 1 (8oz) pkg shredded taco cheese
- 1 (8 count) pkg burrito size tortillas
First you have to cook and shred the chicken. When I know I'm going to shred chicken, I like to boil it. That way it doesn't get that tough "skin" on the outside like when you fry or bake it. Plus, it stays moist that way, which is good because we're going to end up baking it later.

Add the package of taco seasoning to the chicken, along with the amount of water it says on the package. Also add the salsa and cook until some of the liquid boils out and the mixture is the consistancy you like.
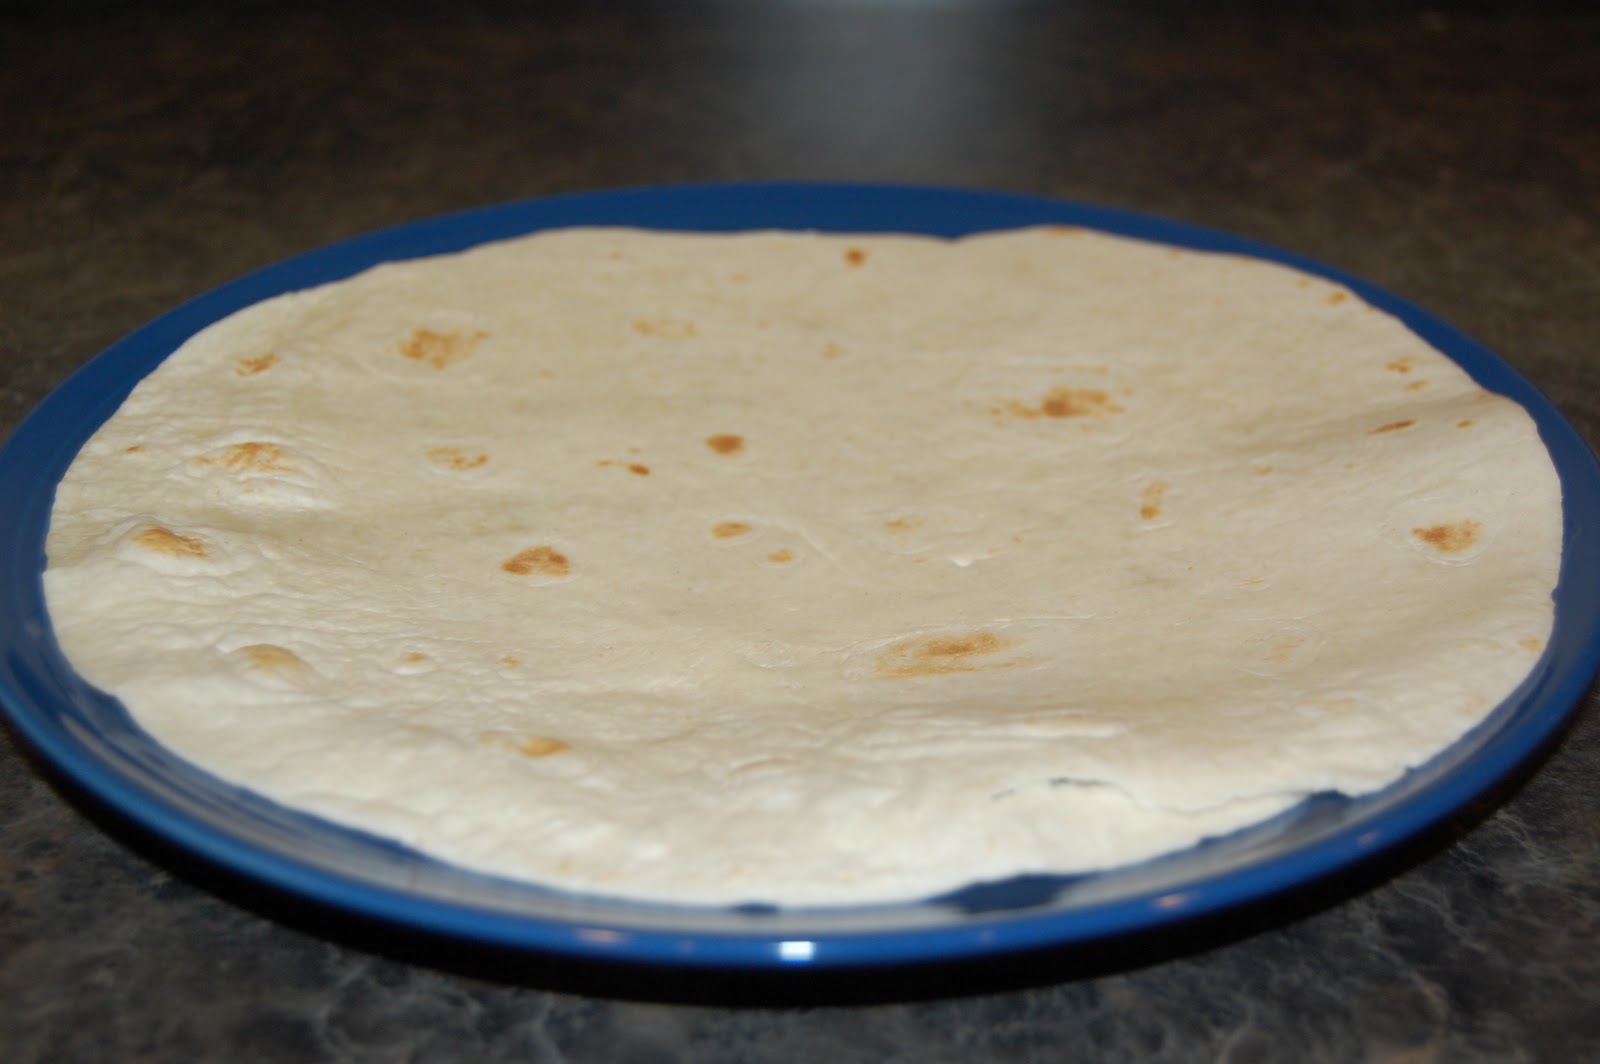
Lay a tortilla flat on a plate.

Spread some refried beans on the tortilla. We like lots of beans. :)
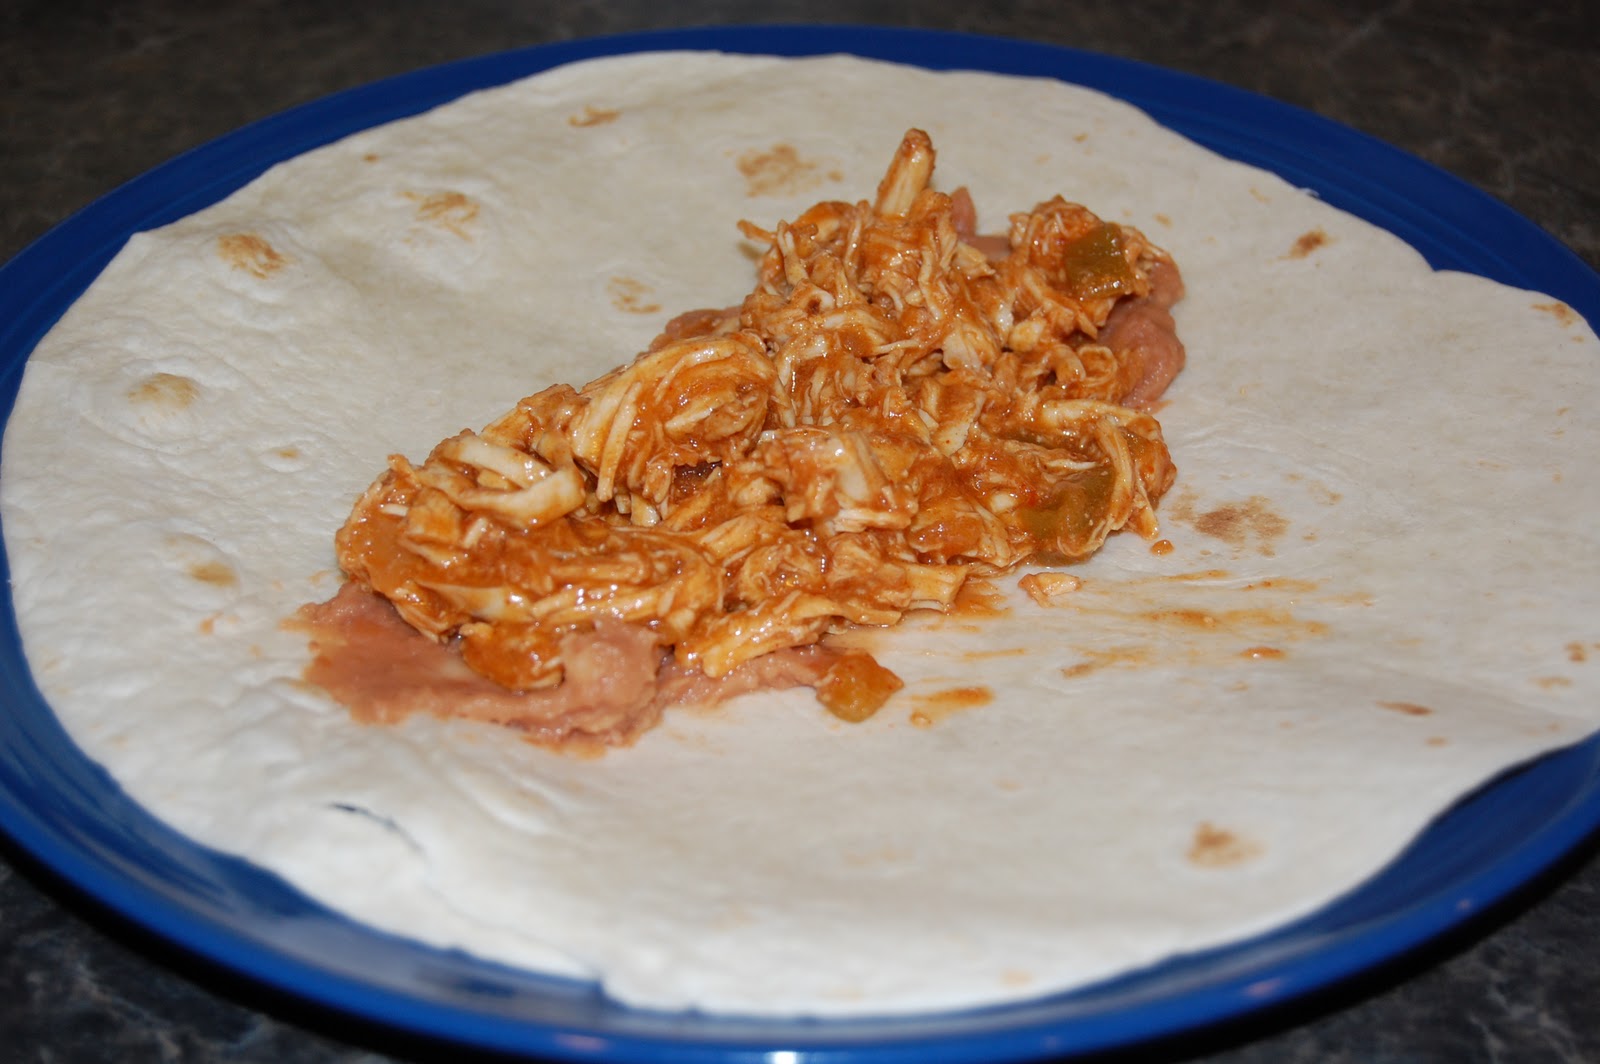
Add some of the chicken mixture.

Then top it with cheese.

Fold the sides under and then roll it up, you know... like a burrito.

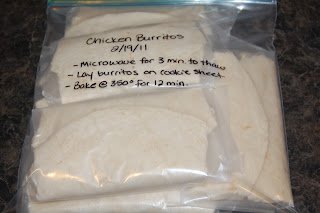
Then wrap it in wax paper so when you put them all in the freezer bag, they won't stick together.

When you're ready to cook them, microwave them for about three minutes to thaw them out first. Then lay them on a cookie sheet and bake on 350 degrees for 12 minutes. I would also add some cheese on top when you bake them because,well, I like cheese. You should know this about me by now.
Thursday, February 24, 2011
Chicken Pesto Pasta
Here's another freezer recipe that I stumbled upon. I'm a really excited to try this one because it looks amazing! I found it here, but I did some tweaking based on the blog comments. First of all, instead of stuffing shells, I decided to make it into more of a casserole so that the tops of the shells don't try out with no sauce on them. I chose to use bow tie pasta, but you could use any kind you want. Second, some of the comments said the recipe was a bit dry, so I used more cream cheese and added a little mozzerella. I do love me some cheese. Third, I used less garlic because I plan to freeze this, and garlic tends to increase in intensity over time, so I didn't want to over-do it.
So here's what you'll need:
- 2 cups chicken (shredded)
- 8-10 ounces of bow tie noodles (or whatever type of pasta you want to use)
- 6 oz cream cheese
- 1 cup shredded Parmesan cheese + 1/4 cup for topping
- 1/4 cup mozzarella cheese
- 4 tbsps prepared pesto
- 1 clove minced garlic
- salt and pepper to taste
First, you want to prepare some pesto.

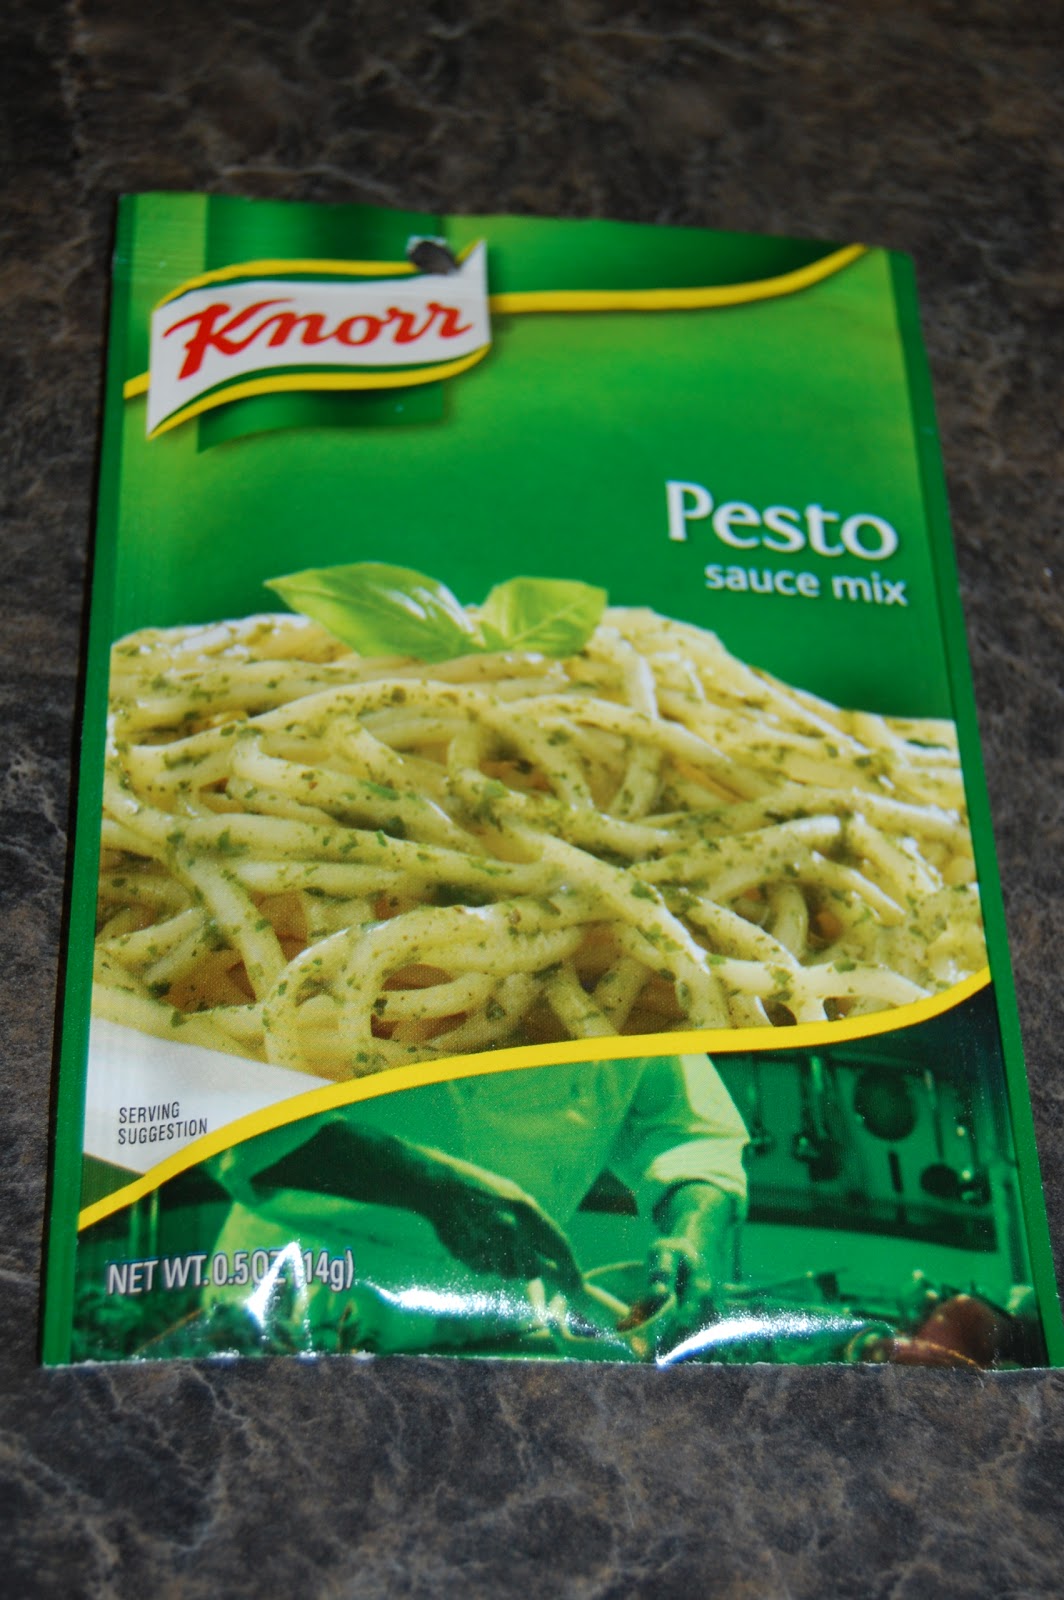
This is what I used. Just follow the instructions on the package. You'll need some oil and water if you go this route. You might be able to buy pesto already prepared, but we always have this stuff on hand because J really likes it.

This is what it looks like when it's prepared. I know it looks gross, but it's good. Really. I promise.


Put the shredded chicken in a big ol' mixing bowl.

Add the 4 tablespoons of pesto. (Here's where the lighting in my photos got a little wonky. I was playing with the settings and kept changing my mind. Deal with it.)

Now go get your cream cheese. It should be softened. Mine wasn't, so I nuked it for a little bit.

And mince a little garlic.

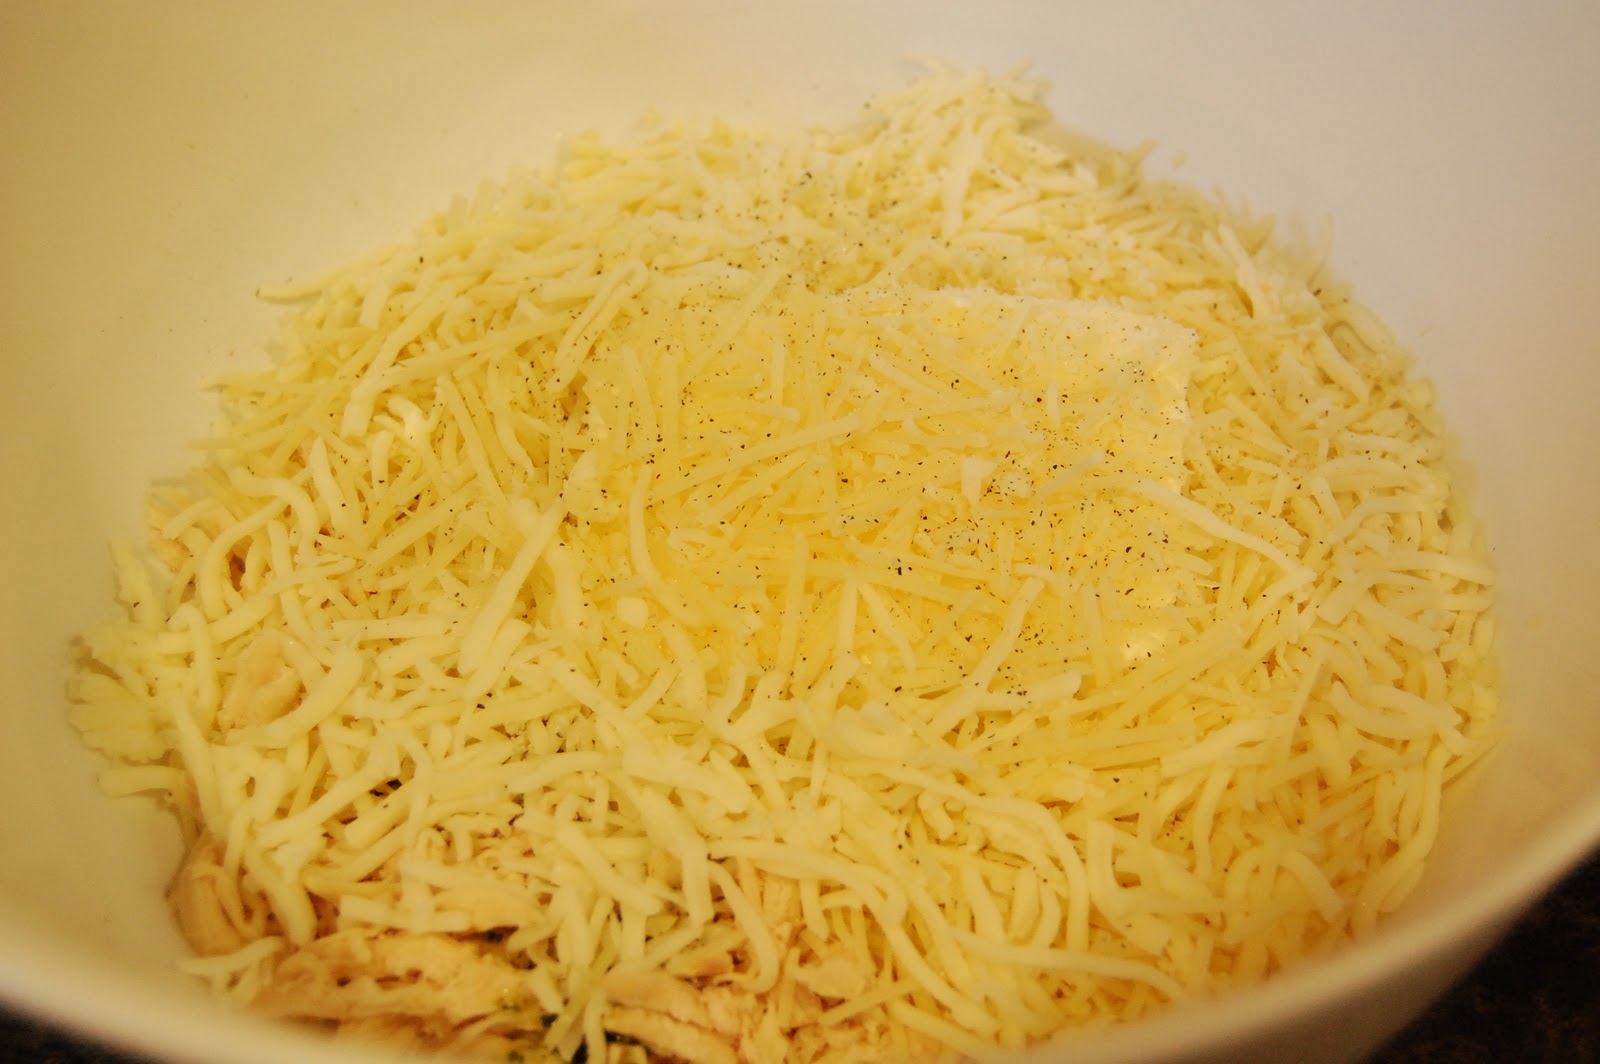
Then add the cream cheese, garlic, Parmesan cheese, and mozzarella cheese to the mixing bowl with the chicken.

Add the pasta and mix it all up. Now I understand why this is supposed to be a stuffing and not a casserole. It's thick. Duh. There are no liquids in it. So stirring may be a little difficult. Just keep at it though, and get the "filling" as evenly distributed as possible.


So here's what you'll need:
- 2 cups chicken (shredded)
- 8-10 ounces of bow tie noodles (or whatever type of pasta you want to use)
- 6 oz cream cheese
- 1 cup shredded Parmesan cheese + 1/4 cup for topping
- 1/4 cup mozzarella cheese
- 4 tbsps prepared pesto
- 1 clove minced garlic
- salt and pepper to taste
First, you want to prepare some pesto.
This is what I used. Just follow the instructions on the package. You'll need some oil and water if you go this route. You might be able to buy pesto already prepared, but we always have this stuff on hand because J really likes it.

This is what it looks like when it's prepared. I know it looks gross, but it's good. Really. I promise.

While you're making the pesto, you might as well start boiling the noodles.

Put the shredded chicken in a big ol' mixing bowl.

Add the 4 tablespoons of pesto. (Here's where the lighting in my photos got a little wonky. I was playing with the settings and kept changing my mind. Deal with it.)

Now go get your cream cheese. It should be softened. Mine wasn't, so I nuked it for a little bit.

And mince a little garlic.
Then add the cream cheese, garlic, Parmesan cheese, and mozzarella cheese to the mixing bowl with the chicken.

Add the pasta and mix it all up. Now I understand why this is supposed to be a stuffing and not a casserole. It's thick. Duh. There are no liquids in it. So stirring may be a little difficult. Just keep at it though, and get the "filling" as evenly distributed as possible.
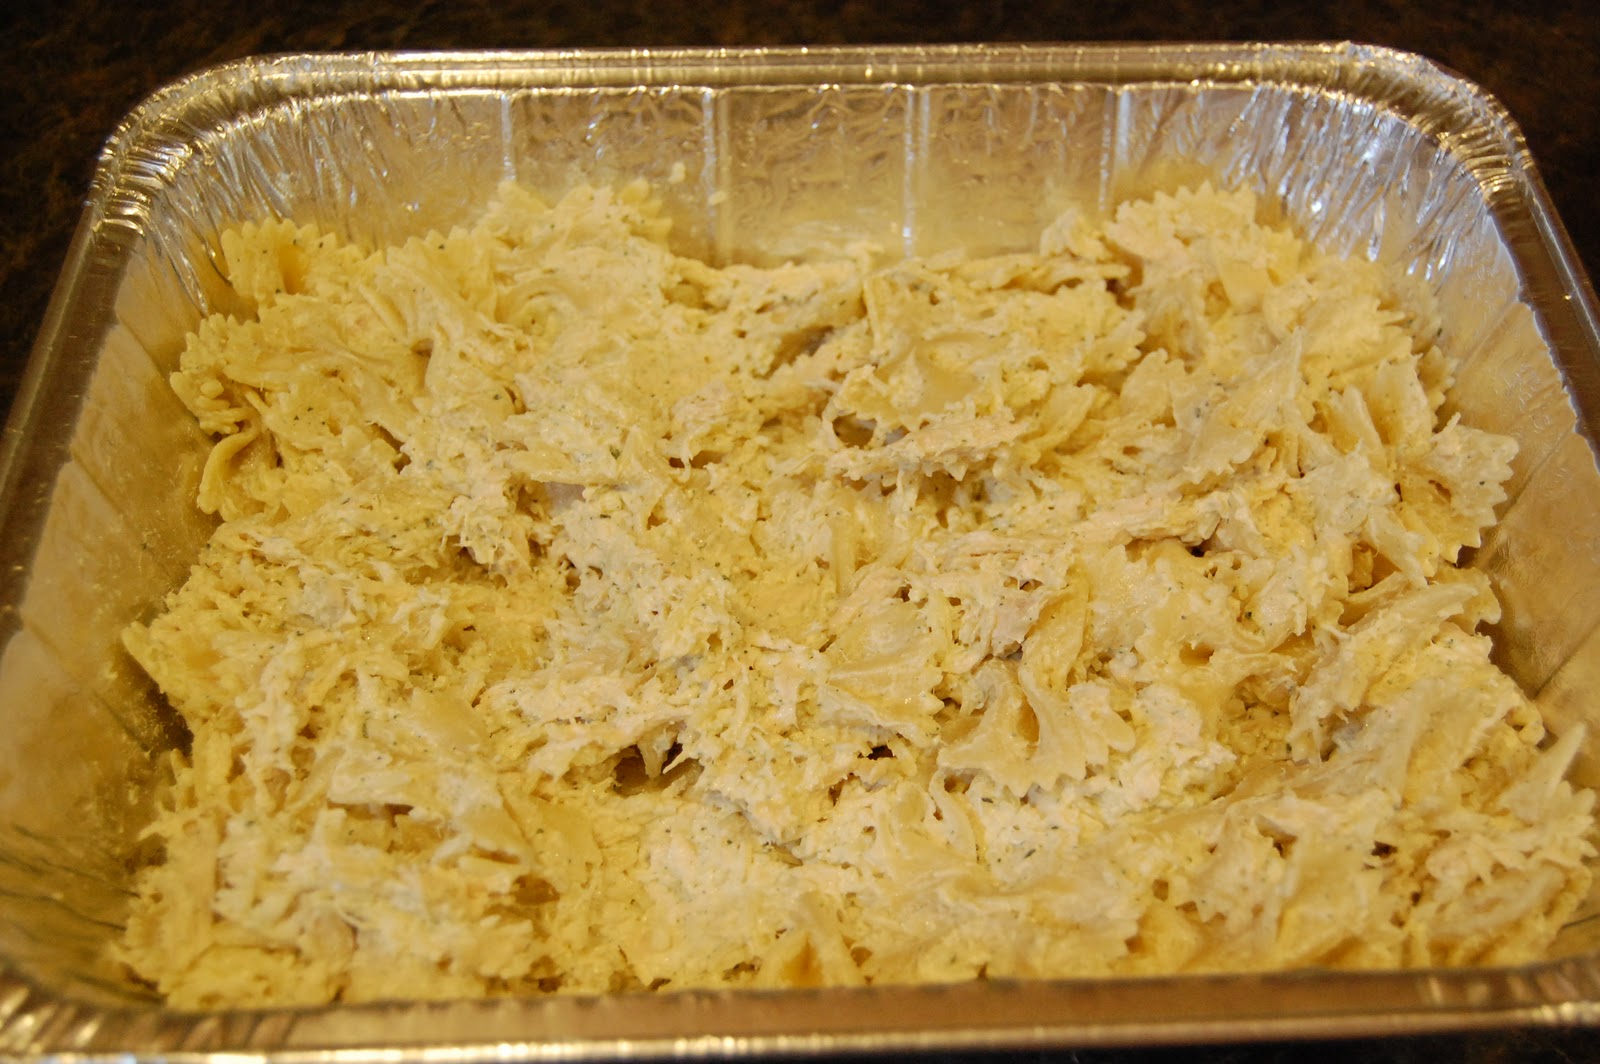
It looks a little dry, but once you pop it in the oven and all the cheesy goodness melts, it will be nice and saucy. I promise hope.

Then add some Parmesan cheese on the top. Just because. I love cheese.

I covered mine with tin foil for good measure, even though it came with a lid. I like to be thorough.
With all the cheese in this dish, you'll probably want to thaw it before baking. Then cook it at 350 degrees for 35-40 minutes.
This smelled so good while I was putting it together. J can't wait to try it, and I agree with him!
Tuesday, February 22, 2011
My Deal-Hunting Comeback
I am interrupting my week of freezer meal posts because there are a few deals out there this week that you guys need to know about.
First, Target has a deal running right now on their frozen food. All of it. Including every. single. item that is frozen. Buy any seven frozen food items, get a $5 Target gift card. Mix this deal with coupons and the possibilities are endless. Here's what I came up with.

I got all this:
6 Tony's pizzas
8 bags of frozen veggies (most are the steam-in-the-bag kind)
3 chicken pot pies
1 package of heat-and-serve sausage
1 regular size Ben & Jerry's ice cream
2 teensy size Ben & Jerry's ice cream
And I paid a total of {drumroll}... $2.56! (After the gift cards, that is. And I seperated my order into two so I could use them on the second half.)
Here are the coupons I used:
- $1/2 Tony's pizzas (x3)
- $1/4 Market Pantry or Archer Farms frozen vegetables (2x)
That's what's so great about this deal! Even if you don't have any coupons, there's a ton of stuff you could still buy to make this a great deal.
And the second thing I wanted to let you know about is at our local grocery store, Hugo's. They have a sale right now on select Kellogg's cereals - 5 for $10.
I bought five and used the $1/3 various and $1/2 Frosted Flakes found here, and paid $8 for all five boxes, or $1.50 each. That's a great deal for cereal, and we eat a lot of cereal at our house.
So there's my big deal-hunting comeback! I was excited about it, so I had to share.
Monday, February 21, 2011
Chicken Souvlaki
When I saw this recipe, the main reason I decided to try it is because I though J would like it. Chicken Souvlaki is a Greek dish (although traditionally it's made with lamb, not chicken, but I'm always pushing boundaries like that). This is another simple dump chicken recipe. I'm all about simple.


Here are the ingredients you'll need:
-1 1/2 tsp oregano
-1/4 tsp black pepper
-1 clove minced garlic
-1 tsp oil
-1/4 cup lemon juice

In a prep bowl, combine the oregano and black pepper.

Now we have to get the garlic ready.

Once you seperate the clove you're going to use, here's what you're going to do: take your knife, set it on top of the clove like so, and then smash the knife against it with your other hand. This will separate the casing from the garlic. It should peel off easily after you smash it.

Then mince it. It's like dicing, but smaller.

Of course, these things are always easier with a little "helper" hanging on your leg.

Ok, now add the garlic and the oil and mix it all up. Now, I probably should have used olive oil, since this is a Greek recipe, but I didn't have much left on hand and I needed it for a different recipe. So vegetable oil it is! What can I say? I'm a rebel.

Now take the lemon and roll it around on the counter a little, pressing down to loosen up the juices. Pay no attention to the man behind the curtain three week old nail polish on my fingers.

Slice the lemon in half and squeeze the juices into a measuring cup until you get 1/4 cup. Squeeze slowly, because if you try to do it too fast, it will just squirt all over the place. Or you could just buy the pre-squeezed juice that comes in the little lemon shaped bottle. I decided to go fresh, then I realized I was going to freeze it anyway, so it doesn't really matter.

Add the lemon juice to the spice/oil mixture. Now take a great big whiff, because it smells wonderful! It made me drool a little.

Put the chicken breasts into a freezer bag, dump the Souvlaki marinade into the bag, and shake it around so it's well coated.

Then lable the bag with all that essential info: name, date, cooking instructions. Lay it flat and freeze it. Done.
Bake at 350 degrees for 30 minutes or so if you thaw it first. If not, more like 50 or 60 minutes.
Sunday, February 20, 2011
Honey Glazed Chicken
The first two recipes that I made on my day of freezer cooking were pretty simple. They're pretty much just chicken marinades. You mix up the marinade, throw it in a freezer bag with a few chicken breasts, freeze it, and when you're ready to cook, just bake the chicken. I'm actually hoping that we will have a few really nice days in the next month or so and we can grill the chicken. Anyhoo, these types of recipes are aptly named "dump chicken" recipes, because you just dump a bunch of stuff in a freezer bag.
I started with the Honey Glazed Chicken. Here we go!

Here are the ingredients you'll need:
-1/4 cup butter
-1/8 cup soy sauce
-1/2 cup honey

Oh, and of course, chicken. I used three breasts: one for me, and two for J and Isaac to share. Isaac won't eat a whole one by himself. Obviously, I'll make some sort of side along with this when we cook it.

First, melt the butter.

Add the soy sauce.

And add the honey.

Mix it all up and it should look something like this.

Put the chicken in a freezer bag, add the honey mixture, and slosh it around a bit. Then lay it flat.

You'll want to lable your freezer bag. Make sure you write what's in it, the date, and cooking instructions. You could just write this right on the freezer bag you already placed the chicken in, but I like to double bag it because I'm paranoid like that.

See. I'm a paranoid double-bagger.
Make sure you lay this flat in your freezer so the juices are evenly distributed.
Bake it at 350 degrees for about 30 minutes if it's thawed, 50-60 minutes if it's frozen.
That's it! Easy, right? Right. One freezer meal down, six to go.
Saturday, February 19, 2011
Freezer Cooking Day
It's freezer cooking day! I randomly chose today to assemble a bunch of make-ahead meals to throw in the freezer for later. I did some research this week and am trying several new recipes - none of which are actually in this post. But fear not, I will be posting them throughout the week. And as I write them, I will link them in this post for your convenience. :)
Here's what's on the docket for today:
For anyone who is interested in making freezer meals (also known as make-ahead meals or once-a-month cooking - OAMC), I thought I'd share a few tips:
Here's what's on the docket for today:
- Honey Glazed Chicken
- Chicken Souvlaki
- Chicken Spaghetti
- Chicken Pesto Pasta
- Chicken Burritos
- Beef Tetrazinni
- Lasagna
For anyone who is interested in making freezer meals (also known as make-ahead meals or once-a-month cooking - OAMC), I thought I'd share a few tips:
- Make sure your dishwasher is empty and ready to be loaded. You will have plenty of dirty dishes when you are done with your day of cooking.
- Order out or have leftovers on your cooking day, because after a full day of preparing meals, you won't want to have to cook supper, too.
- There are certain things you can do the night before your big cooking day to make it easier for you the next day. For example, if your recipes call for shredded chicken, you could cook and shred all the chicken the night before. Or you could brown your ground beef the night before. Things like that.
- When you're ready to quit even though you haven't finished making all of the things you planned, just remember one thing: you are trading one day of aching feet for several days of easy meals and easy clean-up. Trust me, it's worth it.
- Stock up on disposable casserole dishes like the one pictured below. It's actually a roaster pan, but that just means it's extra sturdy. I hate the flimsy ones.


There are many benefits to freezer cooking. I like to do it so that we can have a good, hearty, home-cooked meal and all I have to do is throw it in the oven after work - no prep necessary. It's wonderful. Also, it's much easier for me to decide what to have for supper when all I have to do is look around in the freezer. It keeps me from reaching for the phone to order take-out, because I know I have something delicious waiting and it will be ready to eat in the amount of time it would take for a pizza to be delivered.
And for those of you who don't have the freezer space to cook seven meals at a time - all is not lost! By no means do you have to freeze these recipes. You can prep them and cook them in the same day. These are simply freezer friendly recipes.
Friday, February 18, 2011
February Book: The Short Second Life of Bree Tanner

If you've read Eclipse, you probably can remember Bree Tanner's character. She's the one in Victoria's newborn vampire army who surrendered to the Cullens at the end of the battle. They were going to take her in as part of their coven, but the Volturi put and end to that idea when they snapped her limbs off and burned her. Too bad, she was a sweet girl.
This book tells the story from her perspective. You learn that nobody in the newborn vampire army knew the reason why they were being recruited until a few days before the battle with the Cullens. The newborns were fed nothing but lies to make them fight. Bree and her BFF, Diego, figured out that they were being lied too, but it was too late to do anything about it by then.
In my opinion, The Short Life of Bree Tanner seriously lacked substance. From the brief words I wrote about the book in the previous paragraph, I feel as though I gave away the entire plot line. I was entertained, but barely. I kept waiting for something interesting to happen, and it just didn't. My husband told me that sometimes authors will make notes about certain characters in order to develop them more. I feel like that is what Stephanie Meyer did with Bree Tanner's character, an then published it as a last ditch effort to keep the saga going.
I did find one thing interesting though. The book has no chapters. It's not separated or sectioned in any way. It's just one long story. I think it's supposed to represent the fact that vampires don't sleep. To Bree Tanner, her vampire life was just one long story, too. It wasn't separated by sleep, therefor the book had no chapters, get it? I thought it was kind of neat.
All in all, I was disappointed. If you're totally in love with the Twilight series though, go ahead and give it a read. It won't waste very much of your time.
Thursday, February 17, 2011
Oh What a Weekend!
I'm finally getting around to posting about our shenanigans from the weekend. It was not exactly the relaxing weekend I was hoping for. Here's the low-down.
Friday went off without a hitch. After work, we packed up the car and headed to my in-laws' farm. We got there a little before 8pm. My MIL (mother-in-law) had supper waiting - lasagna and cheese Alfredo pizza. She always over-feeds us because she is from the "food is love" school of thought. It was yummy though. Shortly after supper, Isaac crashed on the floor with his pillow pet and Grandma L's stuffed kitty, which he snatched off of her night stand when we weren't looking. He slept wonderfully.
We all got up early-ish on Saturday so we could get to Pierre at a decent time. It's about a three hour drive from the farm. While we were eating breakfast, J noticed that Isaac's forehead felt a bit warm. Grandma and I agreed, so we gave him some Tylenol and crossed our fingers that it wasn't a big deal. However, in the back of my mind I was remembering that Isaac's friend from daycare was out sick for a few days last week, and I was really hoping that he didn't catch whatever it was that she had. Then we set out for Pierre.
After about two hours of driving, Isaac started to get a bit cranky. I felt his forehead and he was burning up again. About that time, we stopped in a small town called Miller for lunch at the Dairy Queen (which is pretty much the only restaurant in the whole town). After we ordered, we gave Isaac some Motrin to help with his fever. We didn't have a thermometer, so we didn't know exactly how high his temp was, but it was obviously higher than normal. When we got our food (side note: our cheese curds tasted like fish. It was disgusting.), Isaac refused to eat. Even french fries, which he loves. That's when I knew something was wrong.
After we were back in the car and had been driving for about a half hour, Isaac freaked out. I mean screaming, crying, grabbing at his hair, face, shirt, whatever he could get a hold of. This is sooo not at all like my happy-go-lucky little boy. So I decided to call his daycare provider to see if she knew what Isaac's daycare friend had been diagnosed with. The answer: strep. Awesome.
So I called my SIL who is a nurse and asked if Pierre had an urgent care type place we could take Isaac. If he had strep, I wanted to get him on antibiotics ASAP and not have to wait until Monday when we got home. Well, they don't have an urgent care. Our only option was the ER. So that's where we went.
The ER doc checked his ears and ran a strep test. His ears were fine and the strep test came back negative. The doc said it was probably just a virus and to continue rotating between Tylenol and Motrin for the fever. I felt better having gone, even though it probably cost us a couple hundred bucks (not sure if that particular ER is out of network or not), because then I knew we were doing all we could and it would go away soon.
Saturday night was not good, but not as bad as I expected it to be. Isaac woke up a few times crying. The first time, I couldn't get him to stop, so I put him in bed with us (which we've never done before) and he went to sleep there. I, on the other hand, didn't sleep a wink knowing he was right next to me. I guess I was worried about rolling over him or something. So when he woke up again, I gave him something for his fever and put him back in his pack and play so I could get some shut eye.
Sunday was the baptism. James had to take Isaac out of church a few times because he got cranky. Then he played with his cousins and had a pretty good time. He still wouldn't eat though, but was drinking a little. We drove to Watertown that evening and had supper at a Mexican restaurant with J's brother and SIL who couldn't make it to the baptism. Then we went to their house to let the kids play for a while. That's when Isaac had a major meltdown. He was in pain, although we weren't sure where. Then I smelled it - poop! And it occurred to me that he hadn't pooped all weekend! He was working really hard, crying and screaming to get this poop out. When wee changed his diaper and saw the fruit of his labor - a little marble sized poop - my heart sank. My poor baby was probably blocked up. After his diaper change, he went on playing. Not long after that, I smelled poop again and was relieved to see a great big poo in his diaper. It was like that little hard-as-rock marble poop was a plug or something. Then we went back to the farm and went to bed.
Sunday night was HELL! Isaac woke up several times screaming and writhing in pain. It was pretty evident that his tummy was the culprit this time. He kept letting out little toots and then screaming some more. We were helpless. Grandma L tried to help, but there was nothing any of us could do. It was horrible! After about an hour of screaming, Isaac finally fell asleep. My wonderful husband, bless his heart, slept in a separate room with Isaac so I could get some sleep. Being the paranoid Mommy that I am, I kept the monitor on, even though I knew J was in there with him. Isaac woke up crying twice more that night, but the episodes were not as bad as the first one.
Monday morning came, and Isaac was acting like his normal self again, although still not eating. Then around noon, he freaked out again. It was exactly like the episode from last night, and it was terrible. Let me tell you that one of the worst feelings in the world is knowing that your child is in pain and that there is absolutely nothing you can do about it. We quickly packed up and left for home.
As soon as we got into town, we went immediately to the urgent care clinic. Four hours, one exam, and a stomach x-ray later, we found out he had bad gas and an ear infection. Ugh! Four hours in urgent care for GAS! So we gave him his gas drops and amoxicillin and we all went to bed. He was up a lot that night. He would grab his ear and cry and say "Owie, owie!" It broke my heart.
I didn't send him to daycare on Tuesday because he was still pretty crabby that night, and he still wasn't eating. I just couldn't do that to our daycare provider. Plus, I wanted to let him sleep in as much as he wanted to, and make sure he was eating.
Tuesday he was pretty much back to his normal self. He started eating and drinking as usual, and he only had one freak-out session. He really hates having to take the omoxicillin. He fights us and tries to spit it out when we give it to him. I have to hold his mouth open, and even then he just gurgles it until he has to swallow. Last night we put it in his juice and it worked pretty well, but he wouldn't eat it when we put it in his applesauce this morning. Any suggestions are welcome.
That that was our weekend. It was long and stressful, but it was nice to see J's family, and Isaac really got to bond with his Grandma L and Papa since we were with them alone most of the time.
Not exactly the weekend I was hoping for, but that's life when you have a little one.
Tuesday, February 15, 2011
Classic No-Bake Cookies
Here's another recipe for you. I was looking through my folder of blog photos and I found all these no-bake cookie pictures. Then I realized that I never actually wrote a post about these delicious little morsels. I couldn't possibly deprive all two or three of my faithful readers of this recipe, so here it is! I found this recipe on the Food Network website and it's the best one I've tried. And as promised, there are plenty of pictures.
What you will need:
2 cups sugar
4 tablespoons cocoa
1 stick butter
1/2 cup milk
1 cup peanut butter
1 tablespoon vanilla
3 cups oatmeal


What you will need:
2 cups sugar
4 tablespoons cocoa
1 stick butter
1/2 cup milk
1 cup peanut butter
1 tablespoon vanilla
3 cups oatmeal

First you have to put the sugar, cocoa and butter in a saucepan.

Add the milk, and then stir it all together. Bring the mixture to a boil and let it boil for one minute.

This is not a boil. If it looks like this, it isn't boiling. I'm talking a rolling boil.

Now THIS is a boil. When it looks like this, start your timer. 60 seconds. If it doesn't boil long enough, the sugar won't dissolve and your cookies will be grainy and won't solidify correctly, so I usually add about 10 seconds or so on to the boiling time.
After it's done boiling for one minute, remove it from the heat.

Now you want to get the rest of the ingredients ready.

Add the peanut butter and vanilla.

And mix it all together until it's smooth, like this. It shouldn't take long.

Next, add the oatmeal.

Mix the oatmeal in.
This next step is very important. So pay close attention.
Are you paying attention? Ok, good.
The next step is to grab a spoon, dip it into the mixture, blow on it so it cools off a bit, and sample the dough. Sometimes I think it's better warm than when it's cooled and formed into cookies. I could just scoop it in a bowl and eat it with a spoon.
Now you just portion each cookie with a cookie scoop or an ice cream scoop (you can make them as large or as small as you want), plop it onto a cookie sheet covered with wax paper and let it cool.
This is what your finished product will look like.

Now hurry up and eat some, because these are so good I guarantee they won't last long.
Subscribe to:
Posts (Atom)