Wednesday, October 23, 2013

Grilled Cheese Pull-Aparts


I consider myself to be a pretty decent cook. I'm certainly no gourmet chef, but I do know my way around the kitchen. I also make mistakes. A lot of mistakes. (Thankfully, I have a husband who will eat anything!) My mistakes make me a better cook. It forces me to improvise, and then I know not to make the same mistake next time.

One weekend, when James and his dad were working our window frames (that's a post for another day), I decided to try something new for lunch. Here's the first lesson that I learned: Don't make something new when you have company. You will screw it up, and then you will look like a bad cook. I mean, yeah, I make mistakes. But I don't want people to know that I make mistakes! ;) Anyhoo, I made these grilled cheese pull-aparts that have been floating around on Pinterest. They're pretty decent! Everyone seemed to like them. But I definitely took the long way around on this quick, easy recipe, because guess what? I screwed it up. But I improvised.

It goes a little something like this...

I used:
  • block of cheese
  • tube of refrigerated biscuit dough (I used Grands Flakey Layers)
  • 2 tablespoons of butter
First, I cut up a block of cheese into little cubes. You could probably use shredded cheese, but I didn't. No particular reason, I just didn't. And you can use whatever kind of cheese you like. I made two different types: One with Colby and one with American. Next time I'll just use Colby, because the American didn't melt as well as I'd hoped (lesson #2), but the Colby worked perfectly. The recipe that I used for inspiration (linked above) called for Velveeta. I generally don't like to use Velveeta, so I don't when there are perfectly good, and just as easy, alternatives.


Then I flattened the each individual hunk of biscuit dough and piled some cheese cubes on top. I have no measurements for this. I like cheese, so I used a lot.


Then I stretched the dough around the cheese and pinched it shut at the top.


So far, so good...

The Pinterest recipe called for 1/2 cup of butter. That's an entire stick, and entirely too much butter (yes, there is such a thing as too much butter, contrary to what Paula Deen might think). So I cut it down to 2 tablespoons. Really, you just need it to coat the bottom of your 9-inch round cake pan, so there is no need to use a whole stick. Anyway, melt it and swish it around until it covers the bottom of the pan.


Then I put the biscuits in the pan, seam side down.


Then I popped it in the oven according to the directions on the package of biscuit dough, which was 350 degrees for 14-17 minutes. I started with 14 minutes. When I took them out they looked delicious! Nice golden brown, just like they were supposed to look!


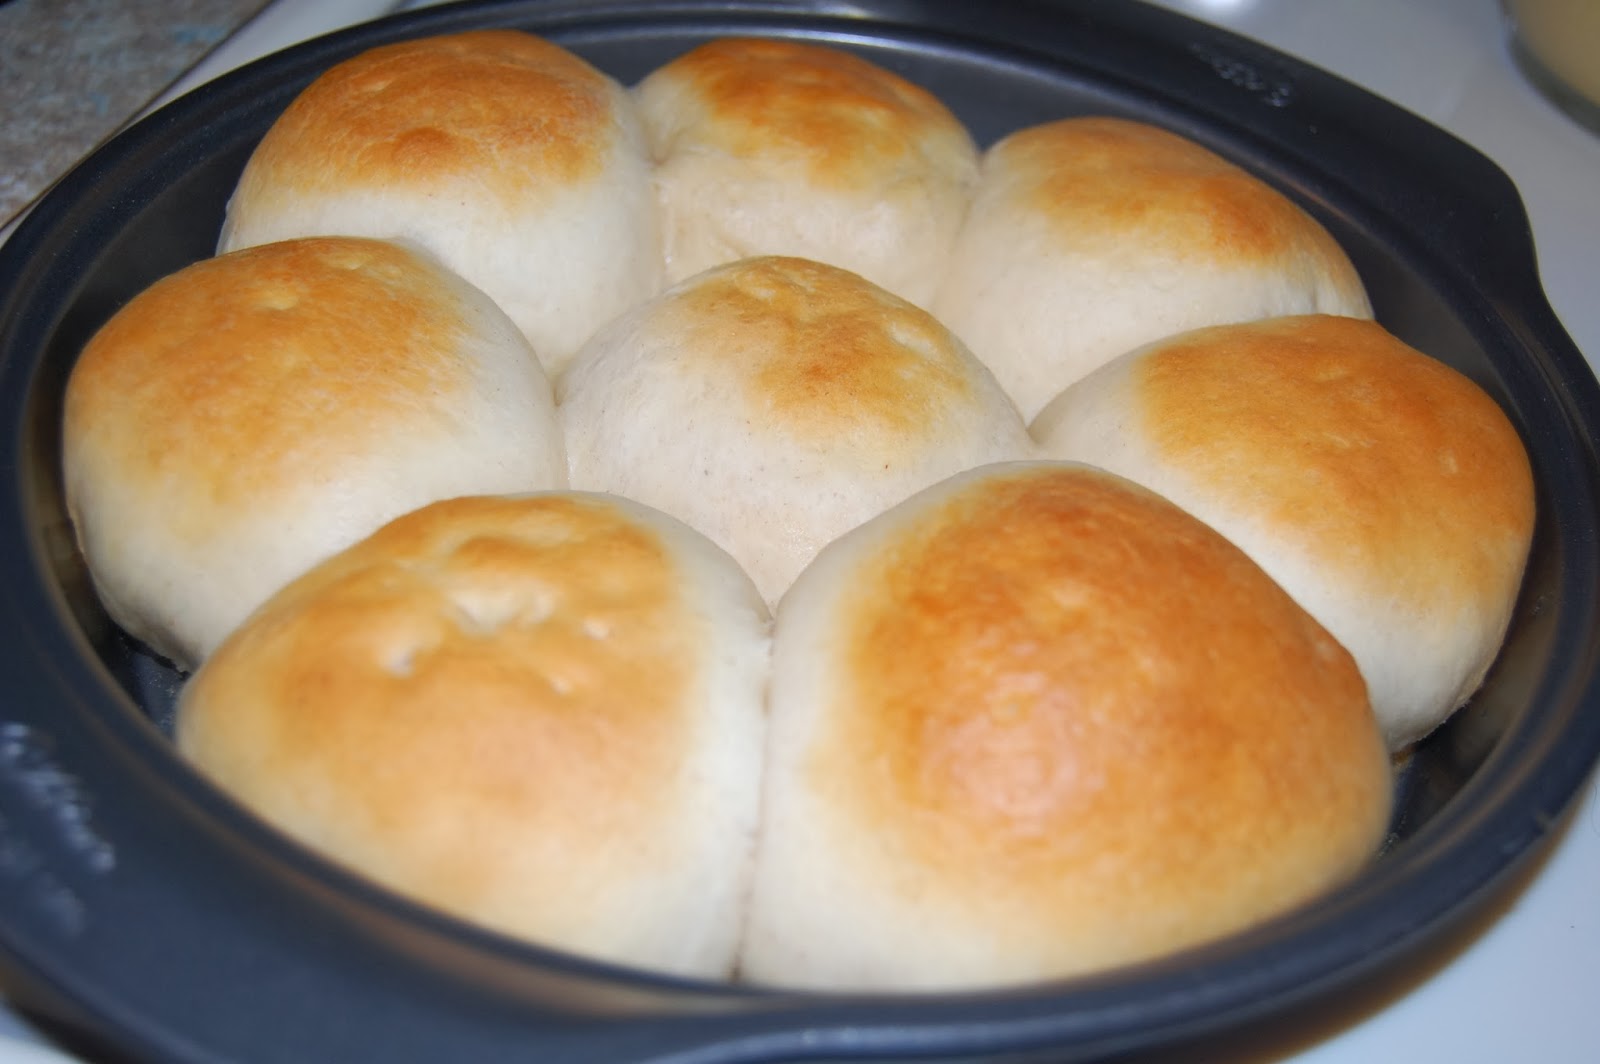
So far, so... not good.

I took one out to put on a plate, and they were doughy in the places where the biscuits were touching each other (lesson #3). Not just a little doughy, but full-on stringy, sticky doughy. Crap.

So I took them out of the pan one by one, and placed them on a cookie sheet with lots of room in between each biscuit. Then I put it back in the oven for another 5 minutes, and crossed my fingers that the tops and bottoms wouldn't burn while the rest of the dough cooked through.


It worked! They turned out great! But for the love of Pete, don't use a 9 inch round cake pan. Save yourself the trouble and just use a cookie sheet from the get-go.

I made some nice hot tomato soup to go with it. It was the perfect lunch for a rainy fall day!


Monday, October 21, 2013

Painting Cabinets

Ever since I started reading home decorating/renovating blogs, I've been fascinated with how wonderful painted cabinets can look. I say can look, because I've also seen some not-so-good cabinet paint jobs. So I was hesitant to do this project myself. If I screwed it up and it looked bad, what would my other options be? A whole new vanity? Then we'd need a new counter top. Then we'd be spending more cash than we wanted to. But I decided to go for it. It didn't look very hard. I thought I could do it. And I'm very happy to report that I was right! Seriously you guys, anyone can do this. It just takes a little time and effort.

Before

Here's what you need:
  • Screwdriver
  • Sandpaper
  • Paint and painting supplies
  • Adhesion primer
Step 1: Take all the doors off and the drawers out. Then remove the hardware. If you want to change the placement of the hardware, this is when you would putty those holes using wood putty. Also, inspect the doors for any chips or gouges and putty those, too. Let the putty dry completely. Thankfully, our cabinets were in pretty good condition, so we didn't need to do any puttying. I did, however, need to glue the corner on one of the drawers because it was coming apart. Dang, those corner clamps come in handy!


Step 2: Take the doors/drawers outside and sand the crap out of them. Well, actually, you just need to do a light sanding so the primer will stick better. Then go back inside and lightly sand the surface of the cabinet frame.
Note: I did the majority of this project after the kids went to bed, so that's why it's dark outside. My neighbors probably thought I was crazy, sanding cabinets at 10:00 PM. Whatever. They don't know my life.

Step 3: Brush everything off with a stiff brush or a broom. I would like to take this opportunity to show off my adorable little walrus hand broom, because that's what I used to brush the sawdust off. Isn't it cute! The snout comes off, that's the brush part, and the head is the dust pan. I love it.

Step 4: Prime it. You want to get some adhesion primer. It's made to be used on smooth surfaces and it sticks really well. It's pretty thick, but works like a charm. I got mine at Lowe's. Most likely, you'll only need one coat of this. That's all I did. It doesn't have to look even, you're just using it as a base for your paint, something for it to stick to.

Step 5: Paint it. You want a high gloss paint for this. I used Sherwin Williams All Surface Enamel in a high gloss finish. The color is Black Bean. Two coats did the trick for me, and it's a super dark color being painted on white primer, so I can't imagine that you would need to do more than two coats.

Step 6: This is the hard part. You should wait as long as you can to put the doors back on. Latex paint take a month to fully cure. We waited a week, and then we tried to leave the doors/drawers propped open as much as we could to prevent them from sticking.

Step 7: Install the hardware before you put the doors back on.

Step 8: Hang those doors back on! Then you're done!

We have no natural night in our bathroom, so I had a hard time getting a picture that showed the true color. This is pretty close, but it doesn't look quite as shiny in real life. I am so happy with the results! And it was a lot easier than I thought it would be.


Sunday, October 20, 2013

Framing a Bathroom Mirror

Okay, so it's been a few months since the bathroom mini-makeover, and I still haven't posted about the details. I said I would, and I like to keep my word, so here it is. Hey, I never said when I would post about the details, I just said that I would do it. And I am. So there.

Our bathroom makeover was easy. A little sand paper, elbow grease, and paint and just about anyone could pull it off. I mean, this project was MY brain child and if I can do it, so can you. That being said, building a mirror frame is going to be difficult for the average Joe to do if he doesn't have (or know someone who can lend him) the right tools. Namely some sort of electric saw, like a miter saw or, as we used, a radial arm saw. It is also helpful to have a corner clamp to hold the corners together while the wood glue is drying.

Here's what else you need:
  • Trim
  • Wood glue (paintable)
  • Liquid nails
  • Paint
  • Corner clamp (not necessary, but helpful)
That's it!

About the trim: You can use whatever kind you like. Just pick what will give you the look you're going for. We used chair rail, but you could use window casing or whatever. I would recommend MDF, which stands for medium density fiberboard. It's still wood (not that cheap foam crap), but it's like composite. It's lighter than the solid stuff, so it will work better for this type of project. Also, I like to get my MDF pre-primed. It lets me skip the priming step, so it's less work later.

Here's how you do it.

Step 1: This is the hardest part (and it's not even really that hard). You have to measure the height and width of your mirror and decide how big you want your frame to be. We made it so the frame is slightly bigger than the mirror, so it hangs off the sides and top just a little bit. You don't want too much overhang or you won't have enough mirror to attach the frame to. Use your best judgement. Then you need to cut the trim to fit. Make sure you have 45 degree angles on all the ends, so they will fit together.


Step 2: Use the wood glue to put the pieces of the trim together to form the frame. This is where the corner clamp will come in handy. Use it to clamp the corners together and let it sit overnight.


Step 3: Once the wood glue is dry, remove the clamps. Put some wood putty to fill any gaps you may have in the corners. You could also use caulk for this, but whatever you use, make sure it's paintable.

Step 4: Once the putty is dry, it's painting time! We went with a deep, rich brown - Black Bean by Sherwin Williams. I wanted an I'm-not-sure-if-this-is-black-or-brown type of color, and this certainly fits the bill! I only needed to do two coats. Once the front is dry, flip it over and paint about 1/3 of the way from the edge on each side (the inside and the outside). When you put the frame up, the mirror is going to reflect a little of the back side of the frame, so you want it to be the same color as the front or it will look funny. (I forgot to take a picture of it after it was painted. My bad.)

Step 5: It's time to put this baby up! We have a pretty big mirror, so we used a whole tube of Liquid Nails. Just apply it to the back where the frame will touch the mirror.

Now you will need to either tape it to the wall for 30 minutes, or sit and hold it yourself. We chose to do the latter, because we had just painted the bathroom walls and the frame, and I didn't want to risk the tape pulling any paint off when we removed it. We stood there, holding it up for 30 minutes. The entire time, we were admiring our handy work.

What a huge difference! In my opinion, this project made the single biggest change in the bathroom.