I consider myself to be a pretty decent cook. I'm certainly no gourmet chef, but I do know my way around the kitchen. I also make mistakes. A lot of mistakes. (Thankfully, I have a husband who will eat anything!) My mistakes make me a better cook. It forces me to improvise, and then I know not to make the same mistake next time.
One weekend, when James and his dad were working our window frames (that's a post for another day), I decided to try something new for lunch. Here's the first lesson that I learned: Don't make something new when you have company. You will screw it up, and then you will look like a bad cook. I mean, yeah, I make mistakes. But I don't want people to know that I make mistakes! ;) Anyhoo, I made these grilled cheese pull-aparts that have been floating around on Pinterest. They're pretty decent! Everyone seemed to like them. But I definitely took the long way around on this quick, easy recipe, because guess what? I screwed it up. But I improvised.
It goes a little something like this...
I used:
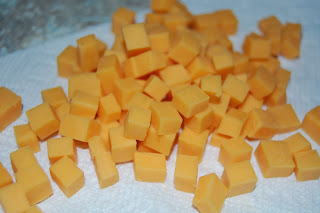
- block of cheese
- tube of refrigerated biscuit dough (I used Grands Flakey Layers)
- 2 tablespoons of butter
Then I flattened the each individual hunk of biscuit dough and piled some cheese cubes on top. I have no measurements for this. I like cheese, so I used a lot.
Then I stretched the dough around the cheese and pinched it shut at the top.
So far, so good...
The Pinterest recipe called for 1/2 cup of butter. That's an entire stick, and entirely too much butter (yes, there is such a thing as too much butter, contrary to what Paula Deen might think). So I cut it down to 2 tablespoons. Really, you just need it to coat the bottom of your 9-inch round cake pan, so there is no need to use a whole stick. Anyway, melt it and swish it around until it covers the bottom of the pan.
Then I put the biscuits in the pan, seam side down.
Then I popped it in the oven according to the directions on the package of biscuit dough, which was 350 degrees for 14-17 minutes. I started with 14 minutes. When I took them out they looked delicious! Nice golden brown, just like they were supposed to look!
So far, so... not good.
I took one out to put on a plate, and they were doughy in the places where the biscuits were touching each other (lesson #3). Not just a little doughy, but full-on stringy, sticky doughy. Crap.
So I took them out of the pan one by one, and placed them on a cookie sheet with lots of room in between each biscuit. Then I put it back in the oven for another 5 minutes, and crossed my fingers that the tops and bottoms wouldn't burn while the rest of the dough cooked through.
It worked! They turned out great! But for the love of Pete, don't use a 9 inch round cake pan. Save yourself the trouble and just use a cookie sheet from the get-go.
I made some nice hot tomato soup to go with it. It was the perfect lunch for a rainy fall day!


No comments:
Post a Comment