Sunday, July 29, 2012

Chicken Wild Rice Casserole


You guys, I have some terrible news. I have to go back to work in 3 weeks. I know, it's bad. I bet all you 9-5, 52-weeks-per-year readers feel really sorry for me. :P Anyway, in preparation of my impending return to work, I've been gettin' my cook on and socking away some freezer meals. And that is good news, because that means you can expect quite a few blog posts coming your way very, very soon.

First up, Wild Rice Chicken Casserole. I love wild rice, so this recipe immediately caught my attention. And it seemed super easy, and I'm super lazy, so that was nice. I found it here. I changed just a few things.

Here's what you'll need:
1 box wild rice (with the seasoning packet) 4.3 oz
1 can cream of mushroom soup
1 can cream of chicken soup
1 can water
1 small can of mushrooms, drained
Boneless, skinless chicken breasts (the recipe said 6, but the ones I had were huge so I only used 3)

Ok, I have no idea why this picture is upside-down. I tried for almost 30 minutes to get the darn thing to upload right, but it just wouldn't work. So I'm afraid you'll have to settle for an upside-down picture. Deal with it. I just wanted to show you what kind of wild rice I used. So there it is. Upside-down.

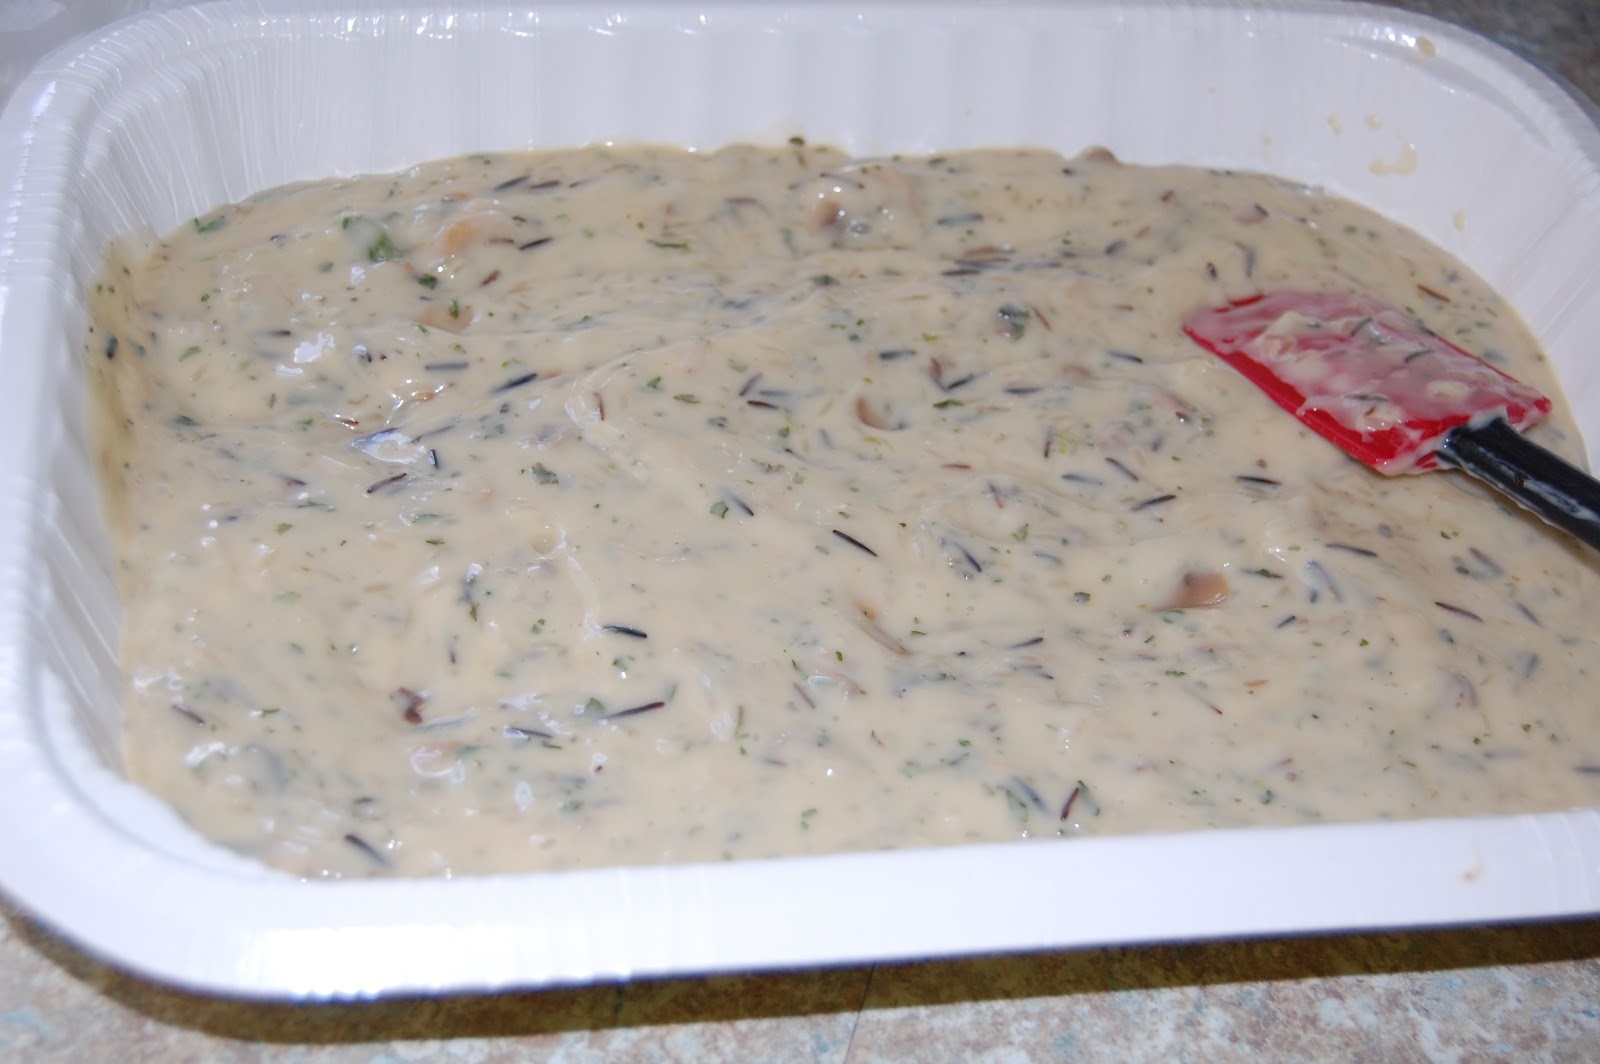
First you mix the wild rice, seasoning packet, both cans of soup, and the can of water. When I say "can of water" I just mean take one of the soup cans and fill it with water.

Then stir in the can of mushrooms. You could also use fresh mushrooms. I prefer fresh, but I didn't have a lot of time since I was doing a lot of cooking, so I settled.

Then spread it into a casserole dish. I typically use those disposable foil ones (P.S. they're cheap), but I had this one in the pantry. It's like a hard paper type one. It's very sturdy and I prefer this kind, but they're more expensive.

Then take your chicken breasts (however many you decide to use)...

... and lovingly place them on top. That's right, lovingly. If you don't do it lovingly, it won't turn out right.

Cover it with foil and write the cooking instructions on top. It may also be a good idea to lable it by writing what it is, which, I just realized while looking at this picture, I did not do. Oops.

Thaw and bake uncovered for one hour until the chicken juices run clear and the rice is tender.

And there you have it. The prep literally takes 5 minutes, and you have a tasty (hopefully) meal you can just toss in the oven!

Wednesday, July 25, 2012

Grilled Cheese Hamburgers


In our family, we really like grilled cheese sandwiches. We also really like hamburgers. So when I saw this recipe, which is so incredibly easy, I had to try it.

It's summer, so we're grilling a lot. One day, when James suggested that we grill hamburgers, I remembered this recipe and said, "Ok!"

James grilled the burgers...

...while I spread a little butter on one side of a few slices of bread, placed it butter-side-down on a baking sheet, put a slice of american cheese on each piece, and baked it at 350 degrees in the oven for about 8 minutes.

And, well, that's it. You just flop one of those burgers between two of these slices of bread, and you have a grilled cheese hamburger. And it is gooooood. I will definitely do this again.


Drool.


Tuesday, July 24, 2012

DIY Wreath


This was actually one of my very first DIY projects! And you guys, it could NOT have been easier!

Here's what you need:
  • a hot glue gun (and glue sticks for it, of course)
  • a wreath - I got mine at Michaels for like four bucks
  • some faux flowers of your choosing
  • one of those wooden letters
  • craft paint, if you want to paint the letter
You literally just glue everything on however you want. It's that easy. I chose to paint the "R" to match the yellow flower. Our house is blue, so I thought that contrast would look nice.

I am so happy with the way it turned out!

Monday, July 23, 2012

Birthday Madness!

Wow. Let me tell you, having your kids birthdays within days of each other is hectic! Fun, but hectic! I can NOT believe that I now have a one-year old and a three-year old! So here it is, the boys' birthdays in pictures.

Opening presents at the farm with the Richter crew
Isaac got a bike from Grandma and Grandpa R
You can never get Isaac to look at the camera if there's cake involved!
The boys birthday cake at the farm
Cake!
Cake!
The morning of Alex's birthday. We couldn't wait, so we let him open his presents right away.
"Today you are you, that is truer than true. There is no one alive who is youer than you."
Hanging out with Grandma Cookie (my grandma, she makes lots of cookies).
Grandma LOVED all the snuggles!
Isaac's super awesome Spider Man cake made by Grandma Olson!
Alex's amazing monkey cake made by my good friend, Cat.

Yummy smash cake! Isaac seems to be enjoying his Spider Man cake in the background.

The boys chillin' in the chairs they got at their party with my mom's side of the family.

Breakfast on the morning of Isaac's 3rd birthday. No, it's not an M. It's a sideways 3. I couldn't change the orientation.

My mom has some serious cake making talent. Isaac was WAY excited about this one.

Playing with his super hero toys with Dad.

Yep. It was a long week.


Thursday, May 31, 2012

Melt-In-Your-Mouth Chicken

Ok, so I don't really know what this stuff is called, but Melt-In-Your-Mouth Chicken is what it's called on Pinterest, so that's what we'll go with. And it does melt in your mouth. It's delicous and super easy! This is a great, quick, weeknight meal!

Here's what you need:

4 chicken breasts (best if they're halved)
1 cup mayonnaise
1/2 cup parmesan cheese
1 1/2 tsp seasoning salt
1/2 tsp ground black pepper
1 tsp garlic powder


Here's what I like about this recipe: I already had all this stuff! I didn't have to go buy anything! Just a note: next time I won't use shredded parmesan cheese, I'll just use the kind in the shaker. I feel like that would work better with this recipe.

This recipe is so easy. Seriously. The first thing you do is mix all the ingredients (except the chicken) together in a bowl.

It will look something like this.

Make sure your oven is preheated to 375 degrees F.

Then just smear the mixture on top of the chicken breasts, and put them on a baking sheet.

Bake for 45 minutes. (Yes, I know I went overboard on the pictures.)

And this is what you get. I know it kinda looks weird, but it's SOOO moist and delicious.

Enjoy!


Wednesday, May 30, 2012

My Son is Amazing

Yep, my son is amazing. Both of them are, but this story is about Isaac and something very heartwarming that happened today.

James and I took the boys to the park that is located only a block away from our house. There was a girl there who looked to be about 10 years old. She was standing on one of the play structures. Isaac, being the little social butterfly he is, stood right in front of her and said, "Hi!" Very loudly. When she didn't respond, he repeated "Hi!" again very loudly. Still, she said nothing. Just sort of groaned. He shouted his greeting one last time, and then decided to head for the slide.

It was pretty clear that this girl wasn't quite right, but after watching her for a bit, it was fairly obvious that this girl had some degree of autism. She was unable to speak, and frequently made "raspberries" with her mouth.

A few minutes later, Isaac started playing with two little girls. They were a little older than Isaac, and decided to go swing. Isaac followed suit, only he'd never swung on a real swing before. It didn't take him long to figure it out, though, with me there showing him how to pump his legs and giving him pushes. A few swings over, the mother of the girl with autism sat, swinging and watching her daughter. She looked sad. I thought about how hard it must be to watch all these other kids, interacting and playing, while her daughter stood there in her own little world. It made me think about how amazingly blessed I am to have two perfect little boys. After a while, the mother left the swing and sat at a nearby picnic table.

A while later, Isaac went over to that same play structure where the girl was still standing. He went over and stood right in front of her, looked right at her, smiled really big, and started laughing hysterically. The girl looked at Isaac, and then started laughing, too! They stood there and interacted for about five minutes, just laughing and making strange noises at each other. The girl would playfully push Isaac lightly on the chest with two fingers, and Isaac would pretend to fall backwards. The girl's mom started to call out her name when she did this, but I was right there and it was obviously playful, so I called out to her mother "It's okay, they're just playing." After a few minutes, I looked over at her mother at the picnic table, and she had a great big smile on her face.

Eventually, Isaac moved on and played on the slide, with other kids, and with his pail and shovel. But for that five minutes, that mother watched her daughter have a typical childhood experience, which I'm certain doesn't happen often. It warmed my heart to know that my child did that. It's amazing to see something like that. He didn't know anything was wrong with this girl. He had no preconceived notions or judgements. She was just another kid, and he wanted to play with her. And play they did. <3

Tuesday, May 8, 2012

Meatloaf Cupcakes


I suppose these would be more aptly named Meatloaf Muffins, since you make them in muffin tins. But in a (failed) attempt to get Isaac to eat them, we called them Meatloaf Cupcakes. But Isaac doesn't like red meat, so even the word "cupcake" wouldn't persuade him to try it.

These are awesome. James and I agree that the best part of a meatloaf is the crunchy part on the end. When you make it in muffin tins, there is much more of the crunchy end deliciousness. So we loved these. Plus, it takes WAY less time to cook than a loaf. This is a really easy, quick, weeknight dinner!

I got this idea on Pinterest, but I didn't use that recipe. I used my recipe, because it's awesome. Here it is. I've posted it before. It's really easy.

Once you mix everything together, just put the mixture in muffin tins...


Then smother it with ketchup...


Then bake it for 30 mintues in a pre-heated 350 degree oven.
And here's what you get.


It's really good. You won't be sorry you made it.


Monday, May 7, 2012

Bipolar Blogging

Oh wow. Zero posts in April. I have a theory about myself. I am a bipolar blogger. I post a bunch of blogs in a row, and then nothing for a long period of time. I really should get better about that. Maybe this summer?

Since my last post, there has been a lot of developements in our family. Alex is crawling around like crazy! He's eating table food, and standing up and cruising along furniture. The is this close to walking. Also, I gave him a hair cut and -BAM- now he's blond. Here are the before and after pics.


Isaac has since learned the art of sucking up. He tells me, "Mommy, you pretty" on a daily basis. And to avoid going to bed he says, "I want to snuggle with my mommy!" He's good. He also had his first "man injury" at the park a few weeks ago. He was climbing up some stepping bars to get to the slide, slipped, and ended up with one leg on either side, crushing his, um, well... stuff. He cried, and he cried hard. When I asked him whatn hurt, he hesitated and then said, "My butt." Haha! I know I shouldn't laugh, but it was a tiny bit funny.

Anyway, I wanted to let you guys know that I have been cooking A LOT lately, so there will be some posts popping up in the near future, as soon as I find time. So stay tuned!

Monday, March 5, 2012

Refill Your Swiffer!

So I found this thing on Pinterest yesterday. It was an article on how to refill your Swiffer Wet Jet. I was actually just about to stop using my Swiffer because I prefer to use more natural cleaning products nowadays. I had about four squirts left in my Wet Jet, so I emptied it and went to work on getting that darn cap off!

Here's what you do.

Boil a small pot of water on the stove, and dip the cap part of the Swiffer Wet Jet bottle into the water for about 90 seconds. Then simply twist the cap off. The heat helps soften the plastic enough so you can just give it a good twist and it will come right off. But make sure to use a towel or something because that cap gets pretty hot.

The cap has these little flaps inside that catch on the bottle so that you can't open it again. Your next step is to cut those off. The article I read says to use a finger nail clipper to just snip them off. I actually made James do this part. Well, I didn't so much make him, as he just took over this part. He loves stuff like this. He said a sharp knife and a steady hand worked way better than a finger nail clipper. Anyway, now you can screw and unscrew the cap at your leisure - no boiling required!


I decided to use my favorite all-purpose cleaner. I'm pretty much in love with Mrs Meyer's basil scented stuff. It smells so fresh and wonderful! And this bottle is super cost-effective. It's about $8, and it's concentrated, so 1/4 cup makes a gallon of cleaner. This bottle lasts a looong time.


So I mixed up a half gallon of my favorite basil scented cleaner and I refilled my Wet Jet! I was SO super happy about finding out this wonderful little tidbit. I really like my Wet Jet, and the fact that I can now use it with my favorite kind of cleaner (that's more healthy for my dog and my kids) really got me excited. I know, that's pathetic, but I try to find joy in the little things. :) 

Aaaaand, I had some cleaner left over, so I poured it into a handy little spray bottle. I only have a little bit left of the all-purpose cleaner I keep in the bathroom, so this will be a great replacement for that.

Sunday, March 4, 2012

Homemade Laundry Detergent

I've been toying with the idea of making my own laundry detergent for a while now. I was hesitant because I have an HE washer, and I wasn't sure if it was okay to use the homemade stuff in it. But everything I've read says it is. So I decided to trust the interweb and go for it. There are several different recipes out there. They mainly have the same ingredients, just different measurements. This is the one I used.


First, you need an awesome washer and dryer in a cool color. Okay, you don't need that, but it sure makes doing laundry more fun! And I just wanted to show off my new washer and dryer, which I love.

Now here's what you do need.

Fels-Naptha (this is soap) - 2 cups, finely grated
Washing Soda - 1 cup (note: this is NOT the same as baking soda)
Borax - 1 cup
Oxygen stain remover, like Sun or Oxyclean (optional) - 1/3 cup

You can get all of these things at Wal-Mart in the laundry aisle. They are pretty easy to find. And they're very inexpensive, which is a plus. I used about 2/3 of the bar of Fels-Naptha to get two cups, so if you want to make a bigger batch, you should get a few bars. The rest of the stuff will last a while, which is why making your own laundry detergent is dirt cheap. Haha, dirt. Get it? Laundry gets rid of dirt? .... tough crowd.

I always feel weird when I say Fels-Naptha. Like I'm trying to say Napsa, but I have a lisp. But I digress...

First you want to grate the bar of Fels-Naptha with the smallest holes your grater has. The smaller you grate it, the better it will blend with all the powders you mix it with.

Then you want to let it sit uncovered over night. I used a couple of plates to spread it out so it would dry out faster. You could use a baking sheet, or whatever strikes your fancy. Just keep it out of reach of kids (or husbands) because it looks a lot like grated cheese. Once it has dried out a bit, just crumble it with your fingers and it will almost turn to powder. This way it will mix better with the other ingredients.

Put all the ingredients into a container.

Then mix it all up. I just put the lid on and shook it. Then I took an old measuring spoon (1 tbsp) and put it in the container for... well, measuring.

Use one heaping tablespoon for normal loads, and two tablespoons for more heavily soiled loads. This has worked out well for us.

I ended up paying around $12 for all these supplies. If you want to do more batches, you'll need to buy more Fels Naptha, but that's cheap, so no big deal. I would guess that all the laundry soap I can make from these supplies will probably last me about six months. That's six months of laundry detergent for the price of one bottle of Tide. Awesome!